The Job Cost > Update Jobs menu option provides access to the Job Center where the list of jobs in maintained. All project information including budgets and contract amounts are set up and maintained through this option. The Job Center is also used to search and view historical transactions on each job.
All the Master Center Screens (ie. Employees, Jobs, Clients, etc) share the same look and basic functionality.
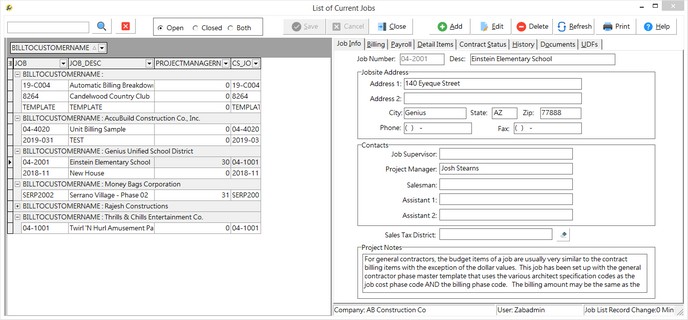
Using the grid: All columns in the grids can be grouped, filtered, sorted and arranged.
•Group the data by dragging one or more columns into the gray area at the top of the grid
•Filter the data within a column by clicking on the down-arrow on the column. Values found in the column will be displayed; click on the value to display the record. Choose the Custom option at the top of the displayed list to enter your own filter criteria.
•Select which columns are visible by clicking on the icon on the left side of the first column on the grid.
•Click on the column header to change the sort order.
•The grouping, visibility and display of the columns will be saved on a user by user basis so each user can customize their own view.
oFilter selections will be reset to default when the screen is closed.
•Master Grid Pop Up Menu - right click on the Master Grid to display the pop up menu
oUse Ellipsis on Cell Overflow - any cell which has too much text to fit in the field will be indicated with ellipsis (...) at the end of the text.
oAdjust Cell Height on Overflow - the cell height will be adjusted to accommodate all of the text in the field
oRestore Grid Defaults - reset the user's custom grid settings on the Master Grid to the default settings
oRestore ALL Grid Defaults - reset the user's custom grid settings on the Master Grid AND non master grids to the default settings. Non master grids cannot be individually reset to the default configuration.
Job Center Buttons
|
Add |
Select the Add option to create a new job.
|
|
Edit |
Select the Edit option to change the job information contained on any tab.
|
|
Delete |
Select the Delete option to remove an existing job from the list .
For audit trail purposes, a notation will be made in the User Activity Log when a job is deleted.
A job must meet certain criteria before it can be deleted. First, AccuBuild will not delete any job with current fiscal year transactions. This includes estimate detail items with current year transaction dates. Second, if a job contains billing items, then the job must be billed 100%, including retention. Third, there may not be any outstanding account receivable invoices or accounts payable invoices in the system for the job, regardless of the transaction date of the original contract billing or invoice.
To remove an existing job from the job master file (joblist.adt), select the Update Jobs option, and then select the job from the job browse screen. Select Delete at the top of the screen to remove all detail records from all related job cost files. This process may take some time to complete, especially if the job cost data files are rather large. When the records have been completely removed, AccuBuild will display the message 'Job has been deleted successfully.'
Suggestion: Be sure to backup your data before proceeding. This backup should be archived in a new company for future reference.
|
|
Refresh |
Select the Refresh option to update the job list with any new jobs or jobs changes from other users in the system.
oStatus Bar at the bottom of the right side screen is used to identify the company and user information for the screen, as well as track screen refresh time.
|
|
Select the Print option to generate the Job Information Report for the job selected in the Master Grid.
|
|
|
Help |
Select the Help option to access the online system documentation.
|
|
Save |
Select the Save option to record your new master record or to save your changes to an existing record.
|
|
Cancel |
Select Cancel to ignore your record changes.
|
|
Close |
Select Close or the 'X' located at the top right of the screen to close the screen.
|
|
Search |
Use the Record Type option at the top of the screen to display master records in the grid for Open, Closed or All record types.
Enter characters in the Search Option field and click the Lookup Button to display a list of master records where the search value is found in any of the following fields: ▪Job Number ▪Job Description ▪Bill To Customer Name
Use the 'Red X' cancel button next to the Lookup Button to display all records for the selected Record Type. |
Job Center Data Tabs
Please refer to the documentation for each data tab for a complete description of all fields.
|
Job Info Tab |
|
Billing Info Tab |
|
Payroll Controls Tab |
|
Detail Items Tab |
|
Contract Status Tab |
|
Job History Tab |
|
Document Tab |
|
UDFs Tab |