The Relations Tab is used to link one client to another. For example, one client could have several divisions with individual mailing addresses and phone numbers. Each division would have a separate client number but a link could be created between the divisions and the primary client so that a complete listing could be viewed on the screen.
Using the grid: All columns in the grids can be grouped, sorted, filtered and arranged.
•Select which columns are visible with the icon on the left side of the first column in the grid.
•The grouping, visibility and placement of the columns will be remembered on a user by user basis.
•Filter selections will be reset to default when the screen is closed.
•To reset the Master Grid defaults, right click on the Master Grid on the left of the screen, and choose 'Restore Grid Defaults' on the Pop Up Menu.
oNon master grids cannot be individually reset to the default configuration but you may use the 'Restore ALL Grid Defaults' to reset the grids.
oRestoring the default settings will only apply to the current user.
How to create a link between clients
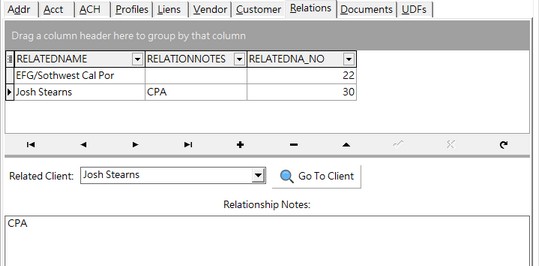
| 1. | To create a link between two client numbers, select the primary client in the list and click on the Relations Tab. The row of buttons in the middle of the screen allows you to add (+), edit (up arrow), delete (-), save (check mark), cancel (x), undo (left return) or scroll through (right and left arrows) any entry. Note: You do not have to click Edit Button at the top of the screen to add a new relation. |
2. Click the Add (+) button.
| 3. | Enter the name of the client that you wish to link to the current client in the Related Client field. Notes to describe the relationship between the two clients can be entered in Relationship Notes field. |
| 4. | Select Save (check mark button) to record your entry. The related client will now appear in the grid at the top of the screen. |
| 5. | Once the link is created, you can jump back and forth between the two related clients by clicking the Go to Client button. |