The Bank Reconciliation option is used to reconcile the ending balance on the bank statement to the bank account balance in the general ledger. This function produces a list of outstanding checks and deposits as well a list of debits and credits for items that have cleared the bank. The bank reconciliation can be created for any month in the current fiscal year as well as the twelve months in the next fiscal year. This means that you do not have to close your fiscal year before creating reconciliations in the next fiscal year.
User access to the payroll account in the Bank Reconciliation program can be secured. This option is labeled 'Payroll Bank Account Access' on the User Maintenance > User Restrictions tab and can be found under the Executive Payroll option. (Note: Users should also be prevented from accessing the Payroll > Properties Screen as well.)
Entries for such items as service charges or interest income should be processed through the Handwritten Checks option of the Payables system or the Misc Non-Invoiced Cash Receipts option in the Receivables system instead of as a general journal entry so that the items can be marked as cleared or outstanding on the bank reconciliation screen. If the items are posted as general journal entries, then they will be included in the general ledger total and the item is assumed to be cleared.
The bank reconciliation program may also be used to reconcile your credit card statements. Please refer to the documentation titled 'Recording Credit Card Charges' in the Payables section of the manual for more information on this feature.
Reconciling a bank statement
| 1. | Select the Bank Reconciliation option on the Ledger Menu and then select Create/Edit to begin a new reconciliation or to edit a reconciliation that has not been posted. The current bank reconciliation is created in a temporary batch file (bankbat.adt) that is located in the user's personal directory. When creating a new bank reconciliation, the account and month fields will be enabled, however, these fields are locked and cannot be updated when editing a reconciliation. As these fields cannot be changed, you must select the Delete option to erase the existing information and then select Create/Edit to start over. |
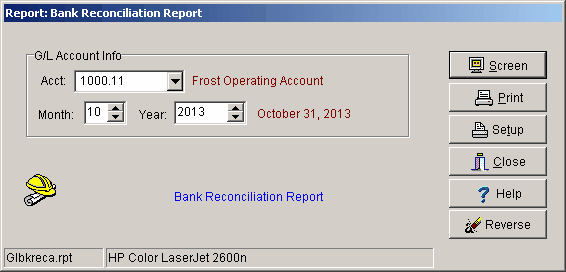
•Acct - Select the general ledger account number for the bank account to be reconciled. This option is only available when creating a new bank reconciliation.
•Month - Select the appropriate month end date from the list provided. The displayed dates will start with the first month of the current fiscal year and end with the last month of the next fiscal year. AccuBuild will make sure that a previous reconciliation has not already been processed for the selected month. This option is only available when creating a new bank reconciliation.
•Bank Statement Info - Date - The bank statement date will default based on the month selected but this date may be changed as desired. Once the date has been entered, you can change it by clicking on the Edit button at the top right hand side of the screen.
•Bank Statement Info - Balance - Enter the ending balance from the bank statement. Once the amount has been entered, you can change it by clicking on the Edit button at the top right-hand side of the screen.
•Create - If this is a new bank reconciliation, you will need to click on this button after entering the above information in order to display the outstanding transactions. If a reconciliation has not been posted, then the current reconciliation information will be displayed automatically.
| 2. | Mark items that have cleared the bank. |
•Click on a column to sort the data. This will help you to find missing check numbers or a specific dollar amount.
•Clear All Button - Use this button to mark all of the transactions on the screen as cleared.
•Reset All - Use this button to mark all of the transactions as NOT cleared.
•Clear - To clear an outstanding item, select the item in the grid and click on the Clear Button. The last column in the grid will show a check mark if the item has been marked as cleared. Click the Clear button again to remove the check mark and show the item as outstanding. Continue to select items as cleared until the 'Difference' total is zero. Use the totals in the 'Bank Debits' and 'Bank Credits' fields to assist you in tying to the debit and credit totals found on the bank statement.
•Add - This button can be used to create adjusting entries to force the bank statement to balance to the general ledger without posting an actual entry in ledger. For example, if the bank has erroneously charged your account for service charges that will be reversed in the following month, you can add a miscellaneous entry in order to force the reconciliation to balance. These type of adjusting entries will be coded with a source 99 and will never be posted in the general ledger.
•Edit - The Edit Button at the bottom of the screen may only be used to edit transactions that have a source code 99.
•Delete - This button may only be used to delete transactions that have a source code 99.
| 3. | If you find that you are missing a check or a deposit, then close the bank reconciliation screen and add your entry in the system. When you return to the bank rec screen, you will be notified that the system has found each of your new entries; click OK through each notice and then close the bank rec screen so that it can refresh. When you open the bank rec screen again, your entries will appear in the list of transactions and can be cleared as needed. (Version 8.5.0.8) |
| 4. | Once the 'Difference' total is zero, the reconciliation is in balance. Be sure to print out a copy of the current statement and then post the bank reconciliation through the ledger. |
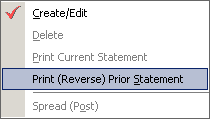
| 5. | You may also print a copy of any prior reconciliation including those for a prior fiscal year by choosing the Ledger > Bank Reconciliation > Print (Reverse) Prior Statement menu option. |
Once the Print Screen Dialog is opened, the Reverse Button which will only be enabled in certain circumstances which are outlined below. When you click the Reverse Button, you will be asked to confirm the reversal before the process is started. Once confirmed, the system will check the posted bank reconciliation to make sure the current historical checks and receipts are still in balance with the original totals when the bank reconciliation was posted. If all is in balance, then the bank reconciliation will be reversed, otherwise the process will be canceled if the amounts are not in balance. The reversal process will mark all the cleared items as un-cleared and then delete the bank reconciliation historically records.
| The "Reverse Prior Statement" option is used in emergency situations where you may have posted a bank rec in error and need to roll back the process. For example, you may have posted the bank rec to the period February 2018 instead of February 2017, or you posted a reconciliation before you were finished clearing the items and the reconciliation is out of balance. The Reverse option first looks for the bank rec with the highest month_year for the selected bank account. In other words, if you have posted a bank rec on account 10014 for the period January 2017 and erroneously posted one for the period February 2018 instead of 2017, then the only bank rec that may be reversed is the one for the period February 2018. In addition, the system compares totals from the posted bank rec to the cleared check and receipts totals in the historical tables to make sure that the amounts are in balance before enabling the Reverse button. |
The following scenarios illustrate when a bank rec may or may not be reversed:
Reversal is allowed:
•A check voided in the SAME period as the check date after the bank rec for the check period has been posted.
•Example : Check 44 dated 02-01-17 was listed as outstanding on the February 2017 bank rec but should have been voided. The check was voided with a date of 02-28-17 after the bank rec was posted. The Reverse option for the February 2017 bank rec will be allowed provided you have not posted a bank rec for a later period on the same bank account.
•A new check or receipt record has been posted to the same period as the posted bank reconciliation.
•Example : Check 45 posted with a date of 02-02-17 is posted to the bank account after the February 2017 bank rec has been posted. Provided you have not posted a bank rec for a later period on the same bank account, the Reverse option will be allowed because the new record was not part of the original bank rec.
Reversal is NOT allowed:
•A check voided in a FUTURE period after the bank rec for the check period has been posted
•Example : Check 44 dated 02-01-17 is voided with a transaction date of 02-28-18. In this scenario, the reversal is not allowed and the Reverse button will be disabled.
•Modification of data has occurred on a check or receipt record included in the bank rec.
•Example : The Reverse button will be available but the posting process will fail and display an error that the posted bank rec check or receipts totals do not match the historical records totals.
| The results of the reversal, successful or not, will be logged in the user activity log in case you need to refer back to any information on the reversal. Use the File > Browse User Activity Log menu option for accessing the user activity log. |