This option is used to locate and recover batches of automatic payroll checks that were posted and need to be re-processed. The batch files are returned to the state they were in just prior to the posting process. This option is most often used when a CHECK DATE was incorrectly assigned to the batch. If you have assigned the wrong WEEK ENDING date to a batch, use the Change Payroll Period Dates option on the File > System Administrator > Batch Log Info Screen instead.
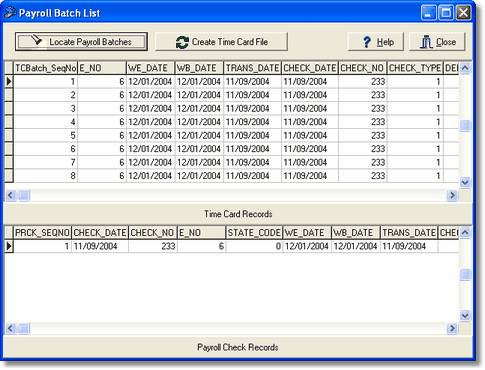
Locate Payroll Batches Button – Use this button to locate batches of time cards in the user folder. The batches are stored with a file name representing the week number of the calendar year but you may find it easier to enable the 'Detail View' option on this screen and select the batch by the modified date on the file. Once the desired batch file is located, the time card records and payroll check records will be displayed. If the selected batch is correct, then use the Create Time Card File button to copy the batch records to the current time card batch.
Create Time Card File – This option copies the located batch records to the current time card batch for processing.
Note: This process DOES NOT remove the original batch of posted payroll checks. After the time cards have been recreated, be sure to have your company's System Administrator remove the posted batch and perform the Integrity Test Update Options in the Payroll, Job Cost and General Ledger systems BEFORE making your changes to the new batch.
Delete the Original Payroll Batch
| 1. | Create a backup of your data before proceeding. |
| 2. | Do not delete the original batch until you have successfully recovered the batch as noted above. |
| 3. | Go to File > System Administrator > Batch Log Info. |
| 3. | Select the batch number. This number is printed on the reports that print during the posting routine and can also be found on the Ledger > Check Register. |
| 4. | Click on the Lookup Batch Records Button to be sure you have the correct data. |
| 5. | Use Shift+Right-Mouse-Click on the Lookup Batch Records Button to get into edit mode. If you do this correctly, you will get a warning. Click OK on the warning. |
| 6. | Click on the Delete Batch Records Button. This will remove all records from the batch but the batch number will remain in the list. Close the screen once all the records have been removed. |
| 7. | Perform the integrity tests listed below. Failure to perform these tests will cause the various employee, job and ledger totals to be inaccurate. |
•Payroll > Integrity Tests > Update Employee Totals
•Job Cost > Integrity Tests > Update Job Master Totals
•Ledger > Integrity Tests > Update GL Master Totals
| 8. | Now that the original batch has been removed, you may make any changes that you need to the new batch, print your checks and post. |
| 9. | Note: Not all batches are the same and some should not be deleted at all (such as those that pertain to accounts payable or accounts receivable). Please contact the AccuBuild Support Team before removing batches. |