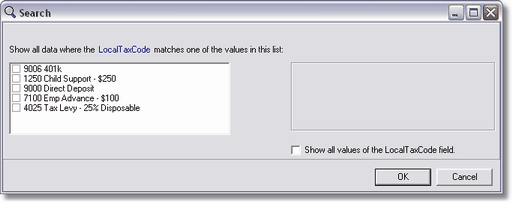
All reports have partial run options for such things as a date range but they may not have all the partial run options that you would like to use. For example, some report dialogs may have a partial run option for the Job List but not the Employee List. Additional partial run options can easily be added to an existing report by using the 'Auto Search' feature along with the 'In List' operator. These options will allow the report to display the 'master list' associated with the selected field. For example, if you were to add the 'In List' operator with the 'Auto Search' function to the E_No (employee number) field, it would display a list of the employees for you to select from when choosing your partial run.
Please note that the 'Auto Search' option can only be used on certain fields on the main datapipe of a report. Please refer to the documentation titled 'Auto Search Lookup Feature' in the Reports manual for a complete list of applicable fields.
The example below provides step-by-step instructions for adding a new partial run option to the existing Local Deduction Report - Transaction Date Range report.
How to add a partial run option for the local deduction code to the Local Deduction Report.
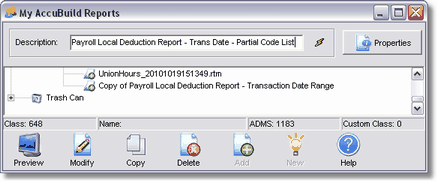
| 1. | On the MAR screen, select the 'Payroll Local Deduction Report - Transaction Date Range' report and then click the Copy Button. The copy of the report will be added to the bottom of the payroll reports list. Select the new report and change the description of the report at the top of the screen. In this example, the report named 'Copy of Payroll Local Deduction Report - Transaction Date Range' has been changed to 'Payroll Local Deduction Report - Trans Date - Partial Code List'. Select the refresh button (the lightning bolt icon) so that the system will save the report with the new name. |
 |
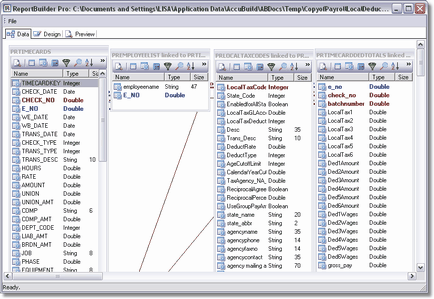
| 2. | Select the new report and select the Modify Button. Select the Report Button. Select 'No' to refresh the report data. The screen will open to the Design Tab. |
| 3. | Select the Data Tab. On the PRTIMECARDS table, select the Search option (magnifying glass icon). This will open the Query Designer Screen. |
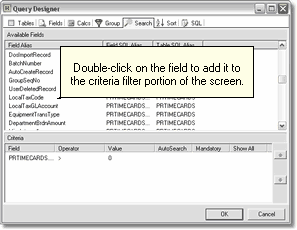
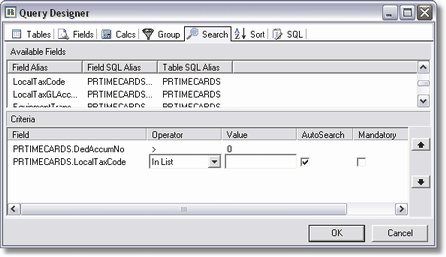
| 4. | On the Query Designer Screen, double-click on the LocalTaxCode field on the 'Available Fields' portion of the screen. This will add the LocalTaxCode field to the 'Criteria' box at the bottom of the screen. |
 |
| 5. | On the LocalTaxCode field in the 'Criteria' portion of the screen, select 'In List' in the operator field and select the 'AutoSearch' box. Click OK. |
 |
| 6. | Click on the Design Tab and click File > Save. This will take you back to the MAR report list. When you print the new report, it will have the normal report dialog box for a partial date range and employee list. Select your date and/or employee range and then click Report to preview. At this point, the system will display a list of the local deduction codes and their descriptions. Select one or more local deduction codes to be printed on the report. Choose the 'Show All Values . . .' option on the bottom of the screen to automatically select all items in the list. |
