
User Defined SQL Views
The video tutorial above covers creating a user defined sql view in the accubuild report designer. The example script below is the same used in the tutorial.
Notes on the Script
a = variable for the clients table
b = variable for the openar table
Fields in the OPENAR table
inv_no = Invoice Number
inv_date = Invoice Date
inv_Desc = Invoice Description
G_amt_Bill = Gross Amount Billed
Fields in the Clients Table
NA_NO = Unique Client Number
NAME = Client Name
Actual Script
select b.na_no, b.Name,a.inv_no, a.inv_date, a.INV_DESC,
a.G_amt_bill
from openar a, clients b
where a.na_no = b.na_no
and
G_amt_bill <> 0
- - - - - - - - - - - - - - - - - - - - - - - - - - - - - - -
User Defined Fields

Take advantage of all the custom report possibilites with user defined fields in accubuild.
If you've ever been in one of the several property screens in the accubuild system, you may have seen the UDF (user defined fields) button. Each module in the AccuBuild system contains a set of UDF's with different data types including character, date + time stamp, double and boolean(true or false).
So many reports and fields are already built into AccuBuild but for those of you who enjoy building something of your own from the ground up, keep on reading.
In this example I'd like to track and report a list of contacts who need some really import information relating to a Job. This could be special instructions relating to a job site such as parking, traffic conditions, road closers & weather.
This example is for those of you who like to build your own reports and would like a better understanding of whats going on behind the scenes..
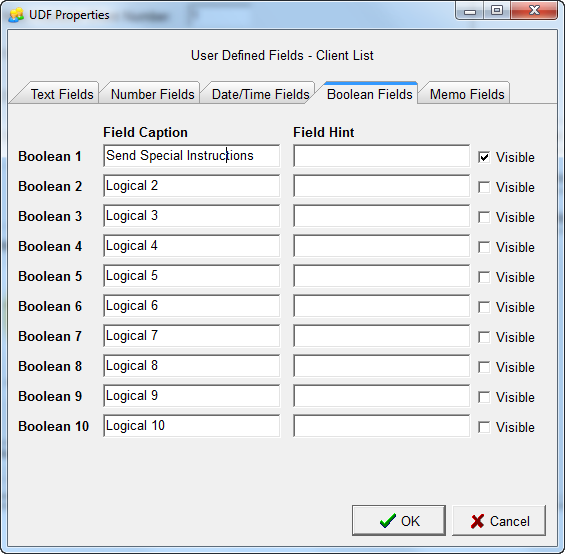
1. Creating the User Defined Field:
Lets use a UDF type of Boolean (true or false) to group our list of contacts together by naming this UDF "Send Special Instructions". Start by selecting Clients | Properties | UDFs. Locate the Boolean tab and enter the Description of "Send Special Instructions" and check the Visible box to make this UDF enabled.
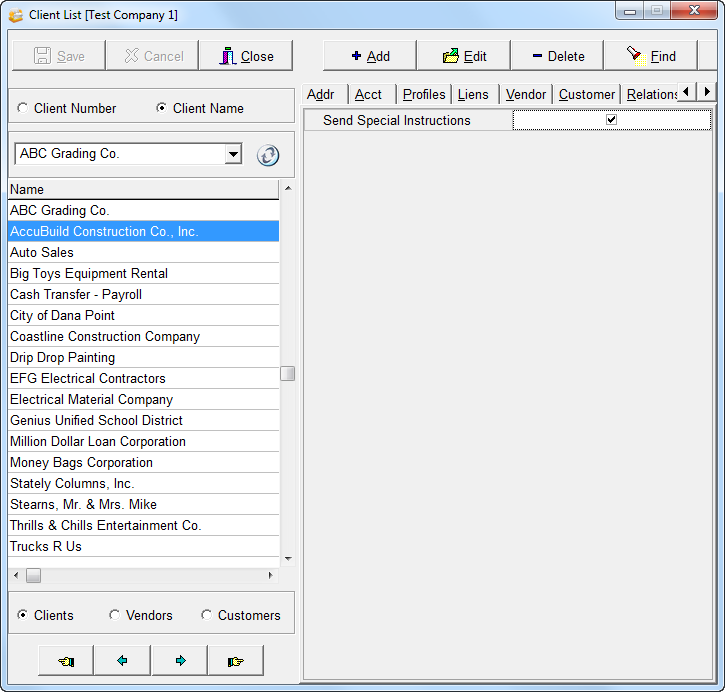
2. Using the User Defined Field:
Start by loading the client list, select a vendor or customer and click the edit button at the top of the screen. The new field will be available on the UDF tab so go ahead and edit, check two or three separate contacts
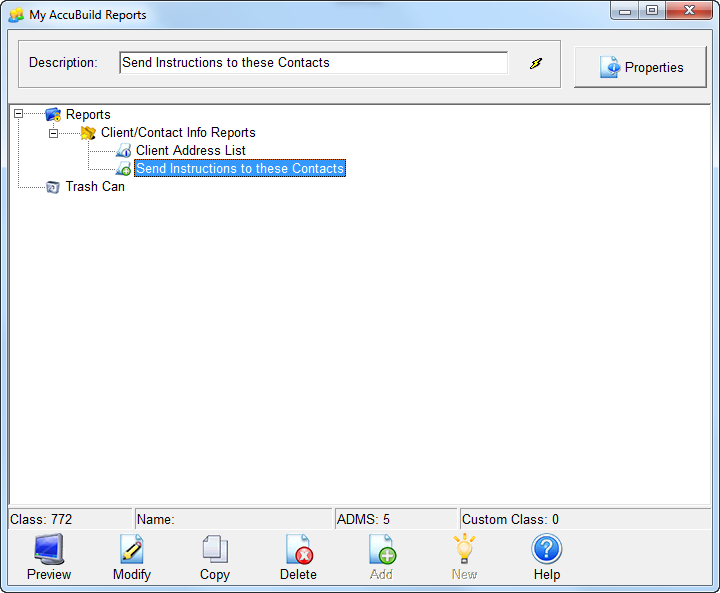
3. Customizing a report to run using our UDF
Make a copy of the client address list by right clicking on the report named Client Address List and selecting copy. The report can be renamed at the top of the My AccuBuild Reports screen - I'm going to call my report "Send Instructions the these contacts".
- Right click on the report and select "Modify"
- Click the report Button to build the report data.
- Click Yes to refresh the data.
- Click on the data tab
4. Adding our UDF to be included with the Data:
Click on the Fields Button at the top of the ClientInfoList data pipe and Double click the field named UDFLogical1 to add this field to the group of selected fields. Once UDFLogical1 is in the group of selected fields, click ok.
5. Making our UDF the search Criteria for this report
Click on the search icon at the top of the same data pipe (ClientInfoList) and double click the field named UDFLogical1. Now we need some search Critera so lets change the operator to the equals sign and type TRUE in the value field. If all the steps above were followed, our report should only show the contacts that have the UDF field checked (set to TRUE). To check this, select the preview icon on the ClientInfoList data to see if our search criteria is working.
Finally, preview the report and save your work.
This was a simple example of using UDF's to track a group of contacts for a specific purpose. There are plenty of UDF's available across the accubuild system so get creative and use them to meet your specific need(s)!